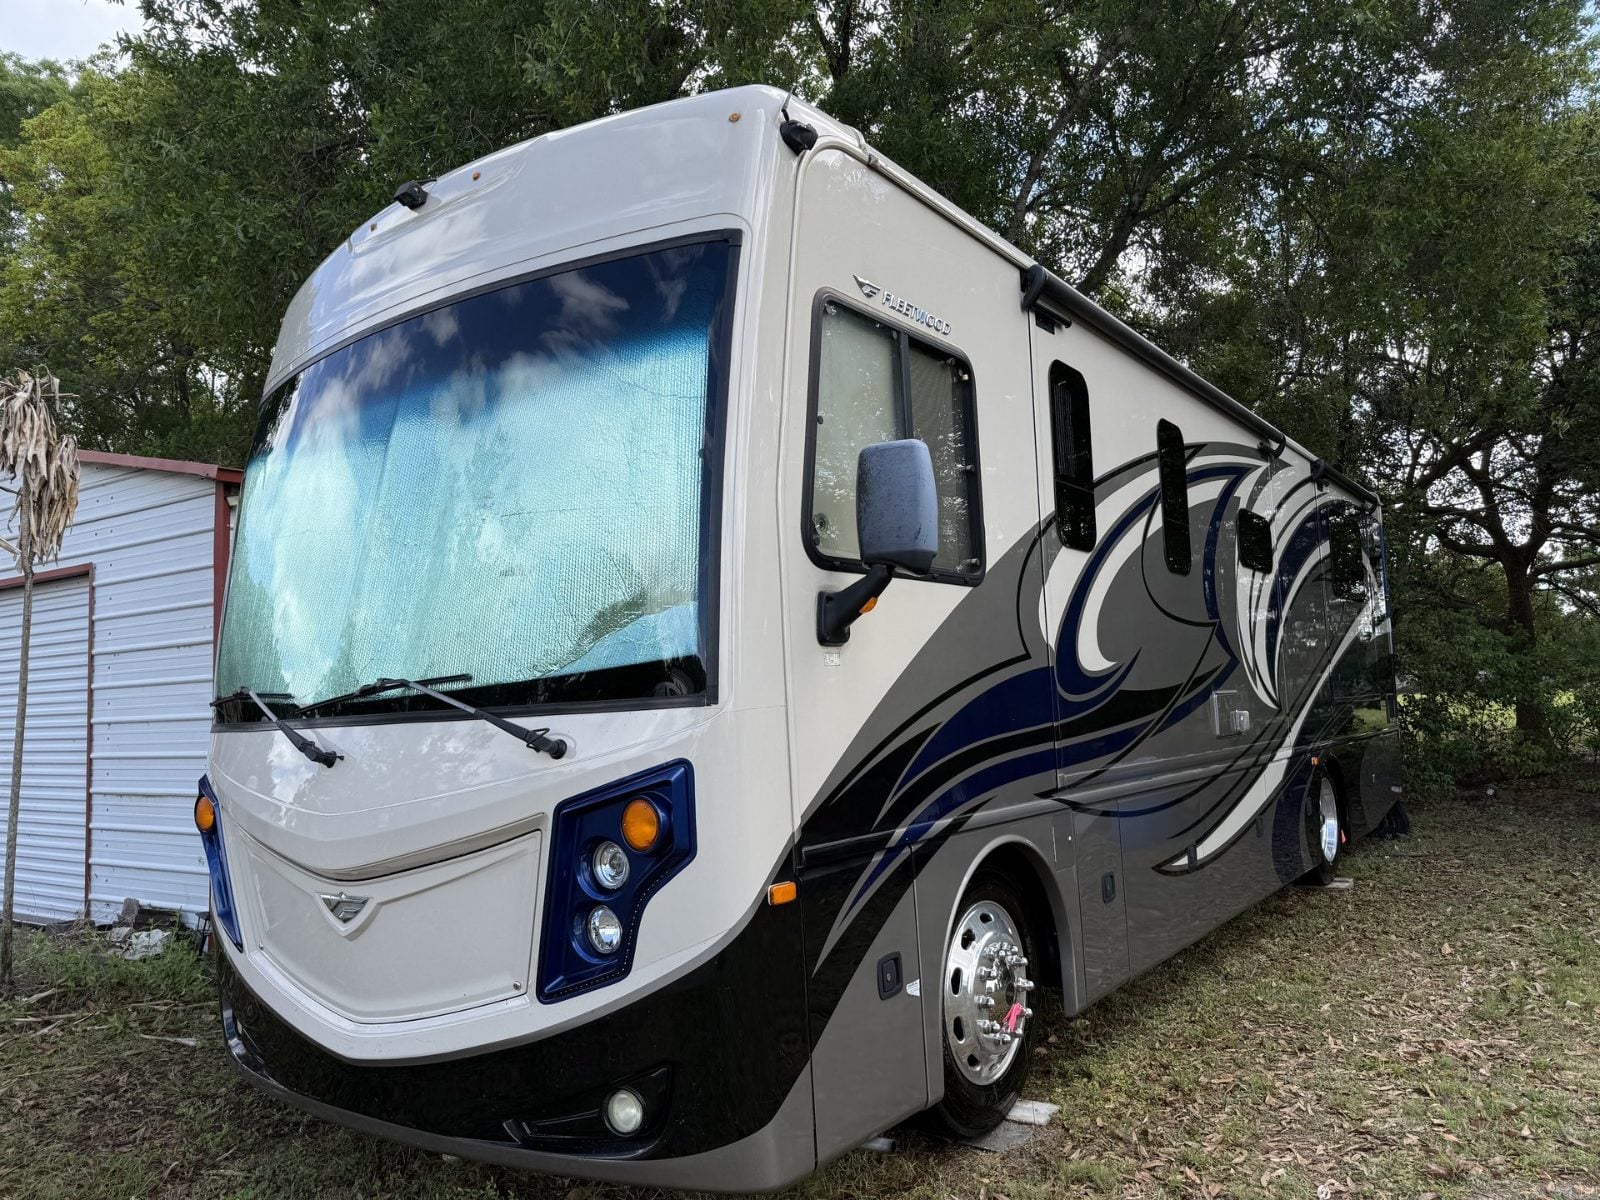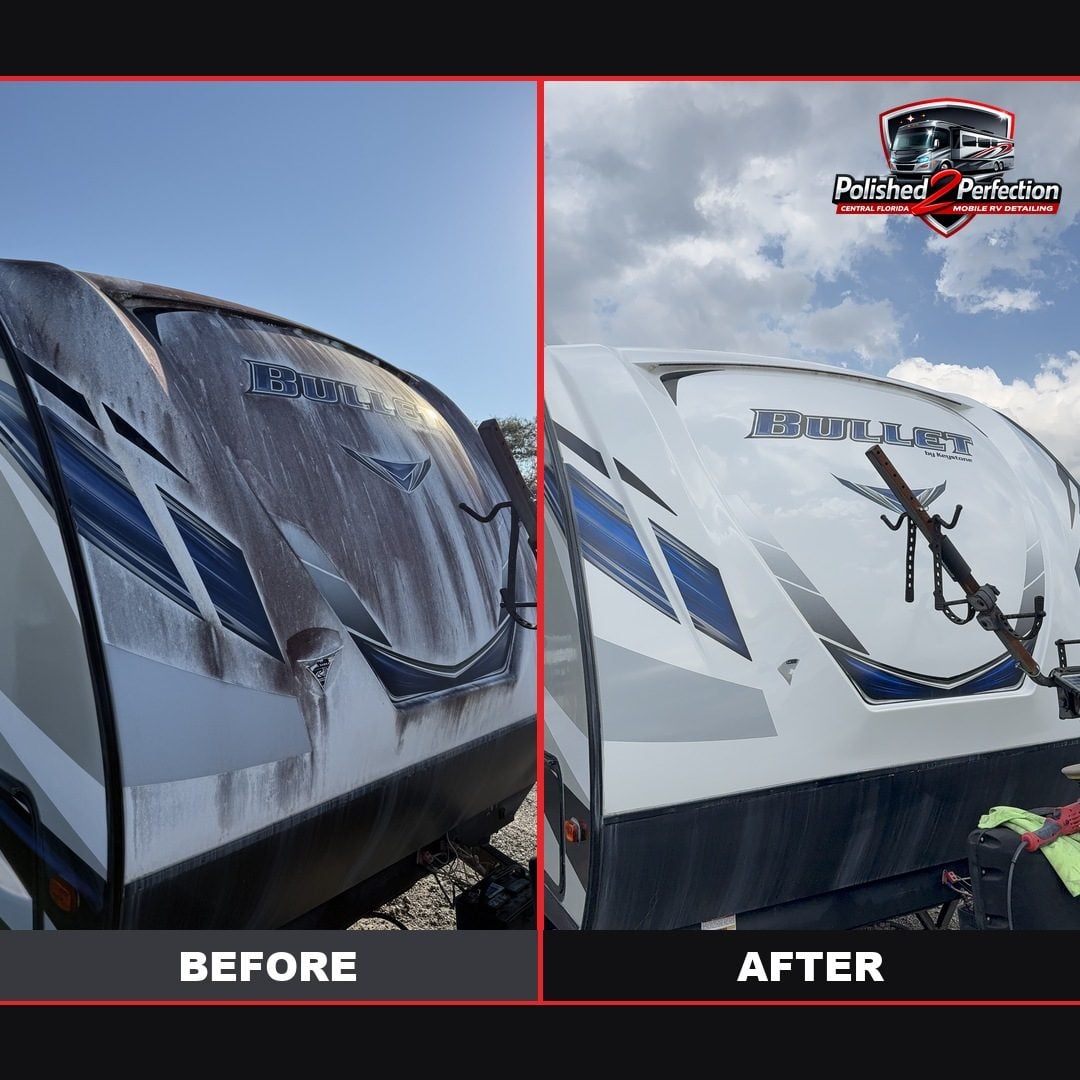

A customer near Ocala called us last spring about a two-year-old travel trailer that looked a decade old. It had lived uncovered in the Florida sun, and the sidewalls had gone flat and chalky. The short version of what we told him, and what this guide walks through: you remove oxidation from a fiberglass RV by cutting the dead, chalky top layer off with a compound and a machine polisher, polishing that fresh surface back to gloss, and then sealing it so the sun can’t strip it again. Light oxidation lifts with a one-step polish; heavy chalk needs a staged cut — heavy compound, to medium, to a finishing polish. The step people skip is the last one, and in Florida it’s the one that matters most.
Start here: is it actually oxidation?
Before you buy a thing, run the chalk test, because it decides the entire job. Press a clean fingertip firmly against a sunny sidewall, then drag it a few inches. The driver’s side and the front cap go first, since they eat the most sun. What comes off your finger tells you how bad it is, and an RV rarely oxidizes evenly, so check three or four spots.
Here’s how to read the result:
| What the chalk test shows | Severity | What it needs |
|---|---|---|
| Clean finger, no residue | Healthy | Just a wash and a coat of protection — no correction. |
| Light white dust | Early-stage | A one-step compound on a machine polisher. A few hours. |
| Heavy chalk that coats your fingertip | Advanced | A staged cut (heavy compound, then a polish), then protection. Most of a day over 30 ft. |
| Yellow tinge or visible cracking | Gel coat thinned | Stop. Compounding thin material can cut through it — get it assessed first. |
That last row is the one owners skip, and it’s expensive. Gel coat is only so thick, and every correction removes a little of it. On an older rig that’s already been buffed a few times, there may not be enough left to safely cut again. It’s exactly what we check with a test spot before we commit — on that Ocala trailer the chalk came off heavy, but the gel coat still had plenty of meat, so it was a straightforward restoration.
What’s actually happening to the finish
Your RV’s exterior isn’t paint. It’s a pigmented polyester gel coat over a fiberglass laminate, the same build as a boat hull. That surface is tough and waterproof, but ultraviolet light is its one weakness. UV, heat, and moisture break down the resin at the surface, and the pigment that was locked in turns to loose powder sitting on top. That powder is the chalk you just wiped onto your finger. Roamly’s RV care guide describes it the same way: UV breaking down the protective layer into a dull, chalky surface.
Almost every guide online treats this as an “end-of-season” job you do once before winter storage. That advice doesn’t fit here. We don’t have an off-season. A rig parked in Central Florida takes brutal UV twelve months a year, so oxidation doesn’t build over one summer — it builds continuously, and it comes back faster after you fix it than it would up north. That’s why the two-year-old Ocala trailer looked worse than plenty of ten-year-old coaches that spend winters in a barn. The sun is the whole story down here. Left alone, the shine dies, then the finish goes chalky, and eventually the gel coat thins enough to crack — at which point you’re into repair instead of a weekend polish.

How to remove oxidation from a fiberglass RV, step by step
Work top-down, in the shade, one 2-by-2-foot section at a time. Never do this in direct Florida sun. Compound flashes off before the pad can work, the panel gets hot, and hot gel coat is soft gel coat you can burn through.
- Wash and decontaminate. A pH-neutral wash pulls off loose chalk and road film, then a clay mitt lifts anything bonded: bug residue, tree sap, iron from brake dust and campground well water. Compound over grit and you grind it into the surface.
- Tape off everything you don’t want cut. Decals are the big one. A wool pad and compound will fade or lift a printed graphic — including the DOT weight tag and tire-info stickers — in a single pass. Mask them first.
- Run a test spot. Tape a 2×2 area, put four or five pea-sized dots of a marine/RV-rated compound on a wool cutting pad, and work overlapping passes for 60 to 90 seconds. Wipe it and look under bright light. Gloss back, chalk gone? That’s your process. Not there yet? Step up to a more aggressive compound or pad before you commit to the whole rig.
- Compound the whole RV. Keep the pad flat, moderate pressure, and keep moving, never dwelling in one spot. A long-throw dual-action polisher with a wool cutting pad handles most moderate oxidation and is far safer for an owner than a rotary, which cuts faster but burns through thin fiberglass in a heartbeat.
- Polish out the haze. If the cut left any hazing or holograms, follow with a finishing polish on a foam pad to bring the depth back.
- Wipe down, then protect. A panel-prep or IPA wipe removes the oils compound leaves behind so your protection can actually bond. Skip it and the wax or coating won’t stick. Then seal it — the part most owners underestimate.
One warning from doing this for a living: the hard part isn’t the technique, it’s the reach. You can’t correct the top third of a 12-foot Class A from a step ladder, and the top third is exactly where the worst oxidation lives, because it’s closest to the sun and never gets rinsed by rain runoff the way the lower walls do. On that Ocala trailer it was manageable from a short ladder; on a 38-foot diesel pusher it’s scaffold-and-proper-gear territory, and it’s most of the labor on a big coach.
Which method fits your rig
There are three honest ways to deal with oxidized fiberglass, and a fourth that’s really just hiding it. Here’s how they stack up:
| Method | Best for | The trade-off |
|---|---|---|
| One-step oxidation remover + wax (e.g. Meguiar’s Marine/RV, 3M Marine) | Light-to-moderate chalking | Cheapest and easiest, but the wax is a few weeks of protection in Florida sun, not a season. |
| Staged compound + polish + sealant or ceramic | Heavy oxidation | Best, longest-lasting result. More time and more cost. |
| Wet sanding (2000–3000 grit) + compound + polish | Severe oxidation a pad can’t cut | Works fast, but takes material off fast too — one wrong pass is repair territory. |
| Paint-on restorer “coatings” | A quick cosmetic cover-up | Hides chalk instead of removing it. Peels and yellows, and has to be stripped before a real correction. We skip these. |
Whatever you choose, the protection step at the end matters more than which compound you bought. Carnauba wax typically burns off oxidized fiberglass in about six to eight weeks of hard Florida sun, so you’re either re-waxing constantly or watching it chalk right back. A sealant buys longer. A ceramic coating is the one that actually fits this climate, since it sheds UV, bug acid, and water spots and holds for a year or more — which is why we steered that Ocala owner toward an RV ceramic coating after the restoration rather than wax.
Can you skip the buffer? And will it come back?
Not really, and yes — but both answers have a useful “it depends.” You can knock down very light oxidation on a small panel by hand with a good compound and real elbow grease, but on the large flat walls of an RV, hand-work is slow and streaky, and you’ll give up before the front cap. For anything past faint dust, a machine is the practical call. The paint-on restorers promise a no-buff fix, but as above, they coat the chalk rather than remove it, which isn’t the same thing as correction.
As for coming back: in Florida, eventually, always. The UV never stops. But how fast is entirely about protection, and this is the number that surprises people. Bare, unprotected gel coat can start chalking again within months. A proper sealant buys you a year or so, and a ceramic coating can hold the finish for years. That’s the whole reason we never hand back a restored RV without protecting it. An unsealed restoration in this sun is half a job that undoes itself.
When to call a Florida pro, and what it costs
Do it yourself if the chalk test comes back light, you’ve got safe roof and upper-wall access, a dual-action polisher you trust, and a shaded morning to give it. A wash-and-protect, or a light one-step on a smaller travel trailer, is a fair weekend afternoon.
Hire it out when the finish is heavily chalked, when you’re prepping to sell, when yellowing or cracking shows up, or when the job means standing at the top of a Class A in July. For reference, here’s real Central Florida pricing instead of a vague “it depends.” We price RV oxidation removal by severity and length: roughly $20 a foot for a light enhancement polish, $30 a foot for a moderate two-stage restoration, and $40 to $50 a foot for heavy, full-chalk gel coat that needs a staged cut and seal. A 35-foot coach is a real number either way. So is a full Saturday on a ladder in Florida heat, plus the products, plus the risk of burning through a panel you can’t un-burn.
Because we’re mobile RV detailing across Central Florida, we bring the scaffold and the water to your driveway, storage lot, or campsite — so you don’t drive a faded 38-footer anywhere. If you’re on the fence, the fastest way to know is a free RV detailing quote on your exact rig and its actual condition. Severity is the only thing that sets the price, and we don’t quote oxidation sight-unseen — which is exactly how we handled that Ocala trailer: a 15-minute look, a real number, then the work.
Faded, chalky rig you’d rather not spend a weekend on?
We restore oxidized RV gel coat to a mirror shine and seal it for Florida sun — mobile, on-site, anywhere in Central Florida. Honest per-foot pricing, free on-site estimate.
See RV oxidation removal →Frequently asked questions
Can RV oxidation be removed completely, or just hidden?
Completely, as long as the gel coat still has enough thickness left. Oxidation is a breakdown of the top layer, so we cut past the dead material and polish the healthy surface underneath back to gloss. We confirm there’s enough to work with during a test spot before committing to the whole rig.
How do I know if it’s oxidation or just dirt?
Wash and dry the panel. If the dull, chalky look is still there, it’s oxidation, not dirt. The finger-drag test confirms it: powdery white residue on your fingertip means the surface is degrading.
Will compound ruin my RV decals?
Yes, if you go over them. A wool pad and compound will fade or lift printed graphics, DOT weight tags, and tire stickers in one pass. Tape everything off before you start, and stay off the edges on adjacent panels.
Can I remove oxidation by hand without a buffer?
Light oxidation on a small area, maybe — with a good compound and a lot of effort. On the big flat walls of an RV it’s slow and streaky, so for anything past faint chalk a machine polisher is the realistic choice.
Is a dual-action or a rotary polisher better for an RV?
A long-throw dual-action with a wool cutting pad handles most moderate RV oxidation and is much safer for an owner. Rotaries cut heavy oxidation faster but burn through thin gel coat easily, so that’s a pro’s tool on a rig that can afford the risk.
How much does professional RV oxidation removal cost in Central Florida?
We price it per foot by severity: roughly $20/ft for a light enhancement, $30/ft for a moderate restoration, and $40 to $50/ft for heavy gel-coat correction. Length and condition set the number, which is why every oxidation estimate here is free and done on-site.
Should I wax it or ceramic coat it after?
For a Florida RV, ceramic. Wax burns off oxidized fiberglass in about six to eight weeks of full sun, so you’d be reapplying constantly. A ceramic coating resists UV and water spotting and holds for a year or more, which is why we recommend it to lock in a restoration here.

Jason SmithOwner — Polished 2 Perfection Mobile DetailingJason runs Polished 2 Perfection, a mobile auto, RV, and marine detailing service based in Central Florida. He and his team have spent 11+ years restoring and ceramic-coating RVs — from travel trailers to 40-foot Class A motorhomes — on-site across Orlando, Ocala, The Villages, Deltona, and Tampa, so the advice here comes from real Florida driveways and storage lots, not a product label.